Transforming your walls with creative DIY decor is easier than you might think. By following clear, step-by-step instructions, you can create personalized and stylish wall art without needing advanced skills or expensive materials. This approach allows you to match your decor to your taste while saving money.
This guide breaks down various simple projects that fit different styles and spaces. Each idea focuses on practicality and ease, giving you confidence to try something new. Whether you prefer minimalist designs or vibrant wall features, the steps are straightforward and manageable.
Getting Started with DIY Wall Decor
Before starting a DIY wall decor project, understanding what materials you’ll need, picking the best wall location, and carefully mapping out your design are crucial steps. These decisions impact the success and look of your finished work.
Essential Materials and Tools
Basic tools like a measuring tape, level, pencil, hammer, and screwdriver are necessary for most DIY wall decor projects. Adhesives such as nails, hooks, or mounting tape depend on the weight and type of decor you’re installing.
Materials vary widely. Common options include canvas, wood panels, fabric, and paint. For more complex projects, consider stencils, brushes, and sealants. Always check paint compatibility with your wall surface.
Safety gear like gloves and goggles protects you during installation. Having a clean workspace and easy access to power outlets is helpful if using electric tools like drills.
Choosing the Right Wall Space
Select a wall that allows your decor to stand out without overcrowding the room. Walls in living rooms, bedrooms, or hallways typically work well based on foot traffic and visibility.
Consider the wall’s condition—smooth, clean surfaces enable better adhesion and fewer installation problems. Avoid walls prone to moisture or extreme sunlight, as these affect durability.
Measure available space accurately, noting any obstructions like light switches or vents. Ensure your design won’t interfere with furniture placement or daily use.
Planning Your Design
Start with a clear vision of the style and mood you want to create. Use sketches or digital tools to visualize your decor’s arrangement on the wall.
Decide the scale of your design in relation to the wall size. Large art needs ample space, while small pieces may benefit from grouping.
List the order of tasks—painting, framing, assembling—based on your chosen materials. Allocate enough time to allow for drying or curing when needed.
Step-by-Step Wall Art Projects
Creating wall art at home can be simple and effective with the right materials and a clear process. Using printables for framing, painting on canvas, or crafting textured hangings each offers distinct styles and requires different tools.
Framed Art from Printables
Start by selecting high-resolution digital printables that suit your décor style. Sites like Etsy or free art repositories provide many options. Print your chosen design on quality paper or cardstock.
Choose frames that match your interior—wood, metal, or simple black frames work well. Remove the glass to avoid glare if using textured paper. Center the print inside the frame and secure it with frame tabs or tape.
Mount the framed art evenly on the wall with measuring tools and proper hooks. Use levelers to keep the frame straight. This project takes about 30 minutes from start to finish.
Hand-Painted Canvas Creations
Begin with a blank canvas sized to fit your space. Select paints suitable for canvas, such as acrylics, which dry quickly and are easy to work with. Gather brushes of various sizes to create textures and details.
Sketch your design lightly on the canvas with a pencil. Paint base layers first, allowing them to dry before adding details. Use layering techniques for depth and contrast.
Finish by applying a sealant to protect the paint. This type of project encourages personalization and can be completed in several hours, depending on complexity.
Textured Wall Hangings
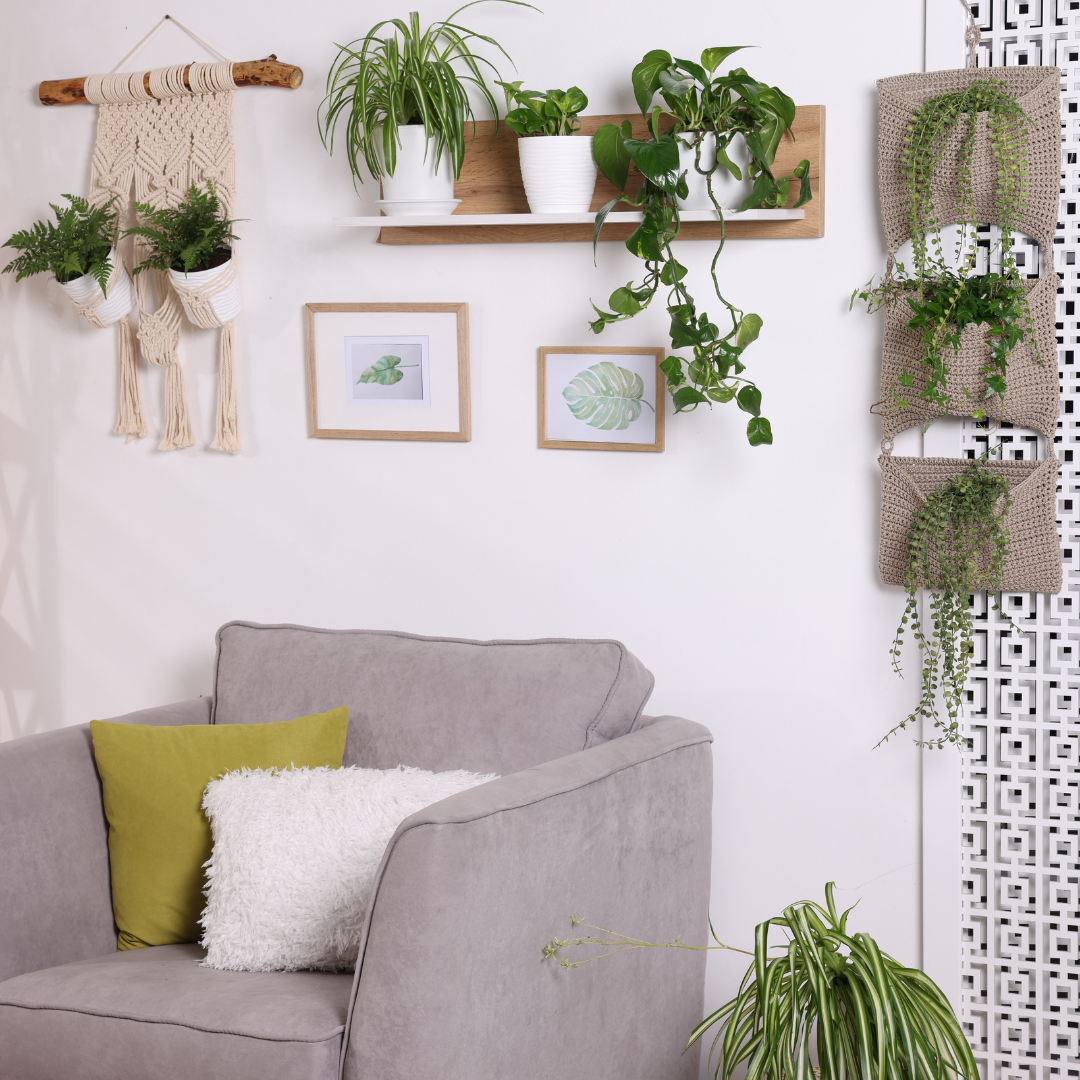
Choose materials like yarn, fabric scraps, natural fibers, or even paper for tactile interest. A simple loom or a wooden dowel can serve as the foundation for weaving or assembling these elements.
Cut fibers to uniform or varied lengths based on your design plan. Knot or weave materials onto the loom/dowel tightly, building layers to create depth and texture.
Secure ends with glue or knots and attach a string for hanging. These projects add dimension and warmth to blank walls and can be customized in color and pattern.
Creating DIY Photo Walls
Designing a photo wall requires thoughtful placement, frame selection, and meaningful content. Each element contributes to a cohesive look that reflects personal style and memories.
Arranging a Gallery Wall
Begin by selecting a central theme or style. Lay out your photos on the floor to test different arrangements before hanging. Symmetrical grids work well for a clean, modern look, while eclectic layouts offer a more casual, dynamic feel.
Measure the wall space to ensure balance between photos and gaps. Keep spacing consistent, typically 2–3 inches apart. Use paper templates or painter’s tape to mark positions on the wall for precise hanging. Prioritize eye-level placement and consider lighting to enhance visibility.
Making Custom Frames
Custom frames can be crafted from inexpensive wood or repurposed materials like old window panes. Sand and paint frames to match your room’s color palette or create contrast for a bold effect.
Use glass or acrylic sheets for protection, cutting them to size if necessary. Secure backing with nails or clips, and add hanging hardware suited to the wall type. Personalize frames with embellishments such as stenciling, decoupage, or textured finishes to emphasize your decor style.
Incorporating Personal Memories
Choose photos that tell a story or capture important moments. Mix in items like ticket stubs, postcards, or handwritten notes to add depth. Arrange these alongside photos using shadow boxes or floating frames.
Label images with dates or short captions if desired, using neat handwriting or printed text for clarity. This approach adds emotional value and creates a visually interesting display that is uniquely yours.
Upcycling and Repurposing for Wall Decor
Upcycling and repurposing offer practical ways to create unique wall decor while reducing waste. These techniques highlight creativity through transforming old items, using recycled materials, and incorporating vintage finds.
Transforming Everyday Objects
Common household items can become striking wall features with minimal modification. For example, old kitchen utensils like forks and spoons can be bent and arranged as art. Picture frames can be painted or layered with fabric for a personalized touch.
Repurposing jars or wooden crates into wall shelves adds functionality and charm. Using tools like spray paint, glue, and simple hardware helps achieve polished results quickly. This approach saves money and gives new life to items that might otherwise be discarded.
Using Recycled Materials
Recycled wood, metal, and paper serve as excellent bases for wall decor. Wood pallets can be sanded and cut into panels for rustic wall art or signage. Metal scraps and mesh sheets can be arranged in geometric patterns or framed for industrial-style pieces.
Old newspapers or magazines can be rolled or folded into 3D wall hangings or mosaics. Using eco-friendly adhesives and stains maintains the integrity of recycled materials. Prioritize sturdy, clean sources to ensure durability and safety in your finished product.
Vintage and Thrifted Accents
Thrift stores and flea markets offer affordable, one-of-a-kind items perfect for wall decoration. Vintage mirrors, plates, or signage can be grouped into curated gallery walls. Small furniture parts, like drawer fronts, can be mounted as shallow shelves or decorative panels.
Choose items with interesting textures or colors that complement your space. A bit of cleaning and repainting can revitalize worn pieces. Mixing thrifted accents with modern decor creates a balanced, eclectic aesthetic while keeping your project budget-friendly.
Modern Wall Decor Techniques
Modern wall decor combines clean shapes, easy application methods, and creative personalization. Using precise patterns, removable elements, and artistic designs, it transforms walls into focal points without complex tools or permanent alterations.
Geometric Wall Patterns
Geometric wall patterns use shapes like triangles, hexagons, and squares arranged to create visual interest. They often rely on painter’s tape to mark off sections before painting. This method allows for sharp lines and symmetric designs.
Choosing a limited color palette improves the design’s impact. For example, a monochromatic scheme with varying shades creates subtle texture, while contrasting colors add vibrancy. Patterns can be repeated or arranged asymmetrically for different effects.
Materials include painter’s tape, level, paint rollers, and high-quality paint. Start with a clean, smooth wall. Measure and mark shapes precisely, then apply tape. Paint inside taped sections and remove tape before the paint dries for clean edges.
Decals and Stickers
Wall decals and stickers offer a quick, non-damaging way to add modern art or motifs. They come in vinyl or fabric, are easy to apply, and can be removed without residue, making them ideal for renters or frequently changing decor.
Design options range from abstract shapes and botanical prints to typographic art. Decals can cover an entire wall or highlight smaller spaces such as corners or niches.
The application requires a clean, flat surface. Peel slowly while smoothing to avoid air bubbles. Layering smaller decals can create customized patterns or murals. Some decals are repositionable, allowing adjustments after initial placement.
DIY Wall Murals
DIY wall murals let you create large-scale artwork tailored to your space. This technique demands more time and skill but offers a unique expression. Simple stencils or projected images can guide painting for precise results.
Start by selecting a design that fits your wall’s dimensions. Sketch or outline the image lightly with pencil or chalk. Use quality brushes and paints suitable for indoor walls.
Options include abstract forms, landscapes, or graphic illustrations. Acrylic wall paints provide durability. If freehand painting feels challenging, printable stencils or projector tracing help maintain accuracy.
Tools list:
| Tool | Purpose |
| Pencil/Chalk | Sketching outlines |
| Painter’s Tape | Masking edges |
| Paint Brushes | Detailing and filling |
| Acrylic Paint | Long-lasting coverage |
| Projector | Image tracing (optional) |
Seasonal and Themed DIY Wall Ideas
Selecting wall decor that changes with time and theme adds variety and personal style to any space. This approach uses specific colors, materials, and motifs relevant to occasions, weather, or room purpose to create targeted visual effects.
Holiday Wall Decor Projects
Holiday wall decor focuses on key celebrations like Christmas, Halloween, and Easter. Popular projects include wreaths made from natural items such as pine cones or dried flowers, and string art spelling festive phrases or shapes.
For Halloween, opt for painted wooden signs with pumpkins or bats, combined with hanging paper lanterns. Christmas ideas often incorporate DIY garlands using felt or fabric scraps, and lighted wall sconces made from mason jars.
Tools needed usually include hot glue guns, craft paints, stencils, and ribbon. These projects emphasize easy, reusable materials that fit the holiday’s theme and colors.
Seasonal Inspirations
Seasonal wall decor adjusts to spring, summer, fall, or winter with elements reflecting nature and weather. Spring often uses floral decals, pastel macrame hangings, or pressed leaf frames.
Summer ideas might incorporate beach-themed prints, nautical knot hangings, or bright woven wall tapestries. For fall, consider DIY yarn pumpkins, rustic wood slice art, or leaf stencils with warm paint hues.
Winter décor tends to feature snowflake cutouts, evergreen branches, and cool-colored geometric prints. The key is using materials and colors that echo the season’s characteristic mood and atmosphere.
Themed Room Accents
Themed decors match specific room functions or interests, such as a nautical nursery or an industrial office. For a nautical theme, create rope mirrors, anchor wall hangings, or driftwood shelves.
An industrial-style room suits metal wall grids, repurposed pipe fixtures as shelves, or framed blueprint prints. For kids’ rooms, DIY wall decals featuring favorite characters or educational themes like alphabets can be applied.
Tips for success: Use consistent color schemes and materials aligned with the theme. Mixing textures—like metal with wood or fabric with paper—adds depth and interest without clutter.
Finishing Touches and Display Tips
Properly securing your wall decor and enhancing its visual appeal are essential for a polished look. The way you hang, light, and maintain your pieces directly impacts their longevity and presence in the space.
Effective Hanging Methods
Choosing the right hanging method depends on the weight and type of your wall decor. For lightweight items, adhesive strips or hooks work well and avoid wall damage. Heavier pieces require anchors or toggle bolts for stability.
Use a level to ensure balanced placement and mark drill points before installation. Picture wire can help with adjustment, while mounting plates offer secure, flush positioning.
Table of common hanging options:
| Weight Range | Recommended Hardware | Notes |
| Under 5 lbs | Adhesive strips/hooks | Easy removal, minimal damage |
| 5 to 20 lbs | Wall anchors, screws | Requires drilling |
| Over 20 lbs | Toggle bolts, mounting plates | Maximum support, secure hold |
Lighting for Wall Decor
Lighting highlights your wall decor’s textures and colors. Use adjustable spotlights or track lighting aimed at each piece to create focused illumination.
Natural light can brighten art, but avoid direct sunlight to prevent fading. LED lights are preferred for energy efficiency and low heat output, reducing damage risk.
Consider installing dimmers for a customizable ambiance. Place lights at a 30-degree angle to avoid glare and shadows, ensuring the decor is evenly lit.
Maintenance and Care
Regular dusting keeps your wall decor looking fresh. Use a soft cloth or microfiber duster to prevent scratches. For fabric or canvas pieces, vacuum with a brush attachment occasionally.
Check hanging hardware periodically to ensure it remains secure. Avoid moisture exposure for wood or paper-based decor; use a dry cloth for cleaning.
For framed art, clean glass with a glass cleaner and a lint-free cloth, avoiding sprays directly on the surface to prevent damage.