What Actually Goes into Installing a Bore Pump System
Most homeowners think that bore pumps are magical things that either exist underground and work or don’t. However, there’s a lot of work that goes into facilitating a bore pump installation ahead of time that makes the process much less daunting. When all goes according to plan, you’re setting up a system that can serve your needs for decades.
It isn’t simply a matter of digging a hole and putting some stuff in. It’s a collaborative process that involves assessing, precision work, and the ability to make different things work together. Here’s what really happens when bore pump professionals install a system from start to finish.
The Assessment That Helps Everything Go Smoothly
Before any digging occurs, someone needs to ascertain what’s actually underground. This means looking at geological surveys and water tables and, sometimes, performing test bores to understand what depths will yield the best flow.
Some areas are much different than others. Some homeowners might find water at 15 meters down while others may have to go 60 meters or deeper. This matters because it informs the type of pump that will be most applicable, the price point of installation and what to expect in terms of output.
Soil composition matters as well, sandy soil has different drainage abilities than clay soil. Rocky ground needs more intensive drilling tools and takes longer to get through, this all gets accounted for in the assessment process. Thus, it’s fascinating to know how much research goes into determining where the best water source is on any given property.
The Drilling Bore Component
What looks like a simple drilling process takes a good amount of planning and execution. Drilling rigs come in different varieties and depending upon which type of soil presents itself, certain drilling methods will be utilized, rotary, percussion, push-down, etc.
As the drilling process commences, installers periodically stop to check water flow at various levels. Just because water shows up does not mean they’re at their intended goal depth. They ideally want something strong and steady that not only remains accessible for their need but doesn’t drain the aquifer. It’s exhilarating when they find a great layer!
Casing gets installed as the drill goes down, this is steel or PVC piping that holds the bore open, avoids collapsing walls and prevents contaminants from the surface entry into the groundwater. The casing needs to be wide enough for the pump that will go into it but narrow enough to minimize outside interference.
Installing the Pump
This portion goes a bit technical but is where working with professionals really pays off. The best bore pump for your needs depends on depth bores, anticipated demand levels and how high the water needs to travel once it gets up there.
People looking into bore pumps perth usually discover submersible options that go with the general bore depth averages in the area and operate reliably for years to come.
The pumps get lowered by hand into the casing using the power cable and riser pipe, this requires precision so everything meshes up well together. It must be at a proper height once settled, electrical components are rated for waterproof use and submersible abilities meaning they’re not going anywhere any time soon given their set location.
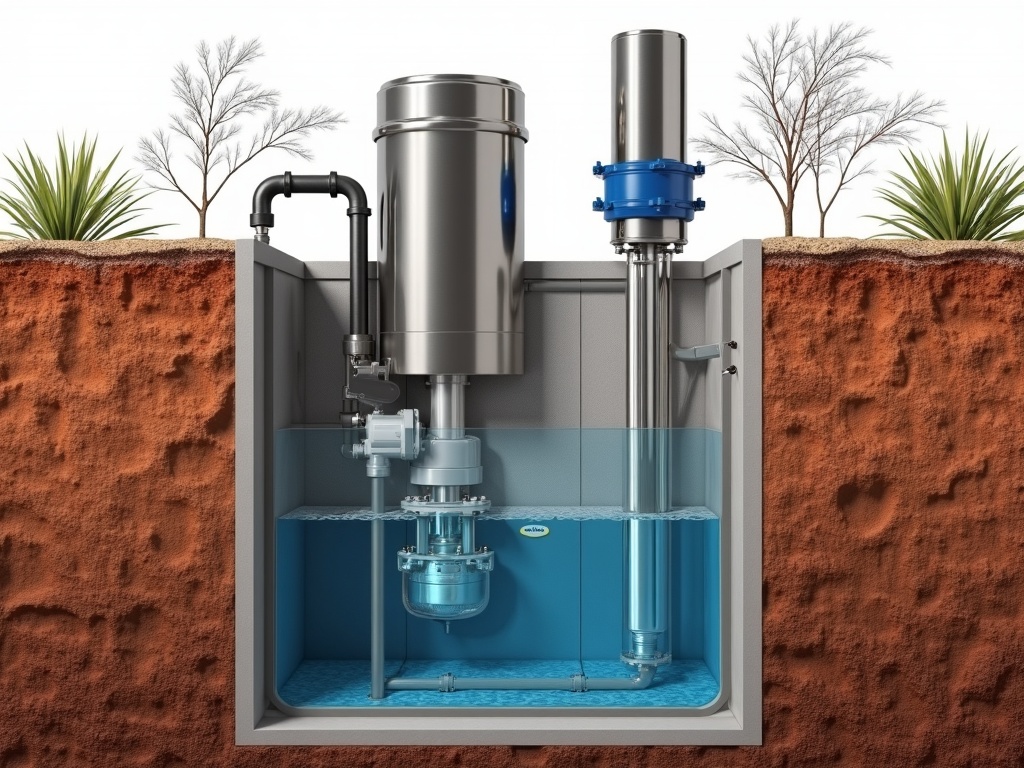
Components Above Ground That Tie It All Together
The installation process is not over when the pump is in place underground; there’s still much work to be done above ground. The pressure tank gets connected to regulate outflow, if it gets too much, it may cause a cycle turnover so having an appropriate tank size means better efficiency and longevity in motor use.
Control boxes turn the pump on and off based on household demand; pressure switches tell it when there’s no more demand, these get more complicated but have things like flow meters and timers, as well as shut off capabilities if anything goes wrong, which provides all homeowners with peace of mind.
The piping runs from the top head of the bore to wherever it’s supplying water, irrigation systems, garden taps, laundry machines, there’s trenching involved, appropriate pipe sizing, and everything needs to connect solidly; good connections here prevent leaks down the line.
The Testing Phase That Confirms Operation
Where good installation crews shine is their final opportunity to impress, they do not simply turn everything on and leave; they run it through its paces multiple times to see how long it takes for usage, how quickly it goes through a cycle, how fast it’s able to recover between uses.
Water quality testing gets conducted around this time too; not all bore water is created equal, some has certain mineral levels, pH count; others are great for gardens but undesirable for other usages unless they’re filtered out first, or left as is, which should be assessed as soon as possible for future determination.
In addition, they monitor how fast it cycles through, it should slowly turn on, regaining pressure, and effortlessly shuts down; everything should run smoothly without screeching noises or disinterest from any part of the system.
What Homeowners Get After Installation
A system that doesn’t require constant vigilance is always welcomed. A tiny bit of annual maintenance keeps it running wonderfully; most systems get serviced annually every two years based on bore water quality and household usage patterns, which isn’t very overpowering.
For example, documentation becomes helpful down the line, information about bore depth, pump specifications, electrical configuration, initial quality tests all matter if any questions arise years down the line, and should you ever sell, this becomes valuable information to relay to new occupants/operators.
Additionally, knowing how things function helps, knowing what normal pressure feels like, how long the pump typically runs for before filling needs to occur and what the water should look like helps homeowners better understand if something goes wrong along the way.
What Factors Influence Installation Pricing?
Materials and labor come at a cost but usually it’s the depth that’s most critical, the deeper systems usually end up costing more because they require more materials and digging time while shallow bores under 30 meters tend to be cheaper options.
Equipment options create specific prices too; while quality systems may set you back more initially, in the long run they’re worth it, they’re better-rated materials (controllers, tanks, piping) that hold up better over time compared to cheaper options that disappoint sooner than later.
Unexpected factors may turn up; hitting rock beds can delay progress or requiring more materials than expected can factor into additional costs, advanced notice from contractors is critical should anything out of the ordinary occur; you don’t want your bill adjusted without warning.
How Does Proper Installation Make It Last for Decades?
When everything’s done properly each piece lasts longer, with great pressure often comes great responsibility; if it’s done wrong from day one then people experience issues with low-pressure systems sooner than later as well as worn out bores from high cycles too often without support.
Additional information comes helpful down the line if things were done appropriately from day one, from adjustments made at installation to notes made from start until finish. Water tables change, household demands change, all should be taken into consideration with an adaptable system.
Understanding what comes with installation makes homeowners feel much better during contracting experiences, from costs to expectations, and how much better it’ll play out, for it’s not an easy installation but definitely worthwhile over time.