Creating easy outdoor DIY projects can transform your home’s exterior without requiring extensive skills or expensive materials. Simple additions like built-in planters, outdoor seating, or decorative lighting can enhance your space quickly and affordably. These projects allow you to personalize your yard while increasing its functionality.
Many outdoor DIY projects use basic tools and commonly available materials, making them accessible for beginners. By focusing on manageable tasks, you can improve your outdoor environment with minimal time and effort.
This post provides straightforward ideas you can start immediately to boost curb appeal and create a more inviting outdoor area. Practical, hands-on projects help you take control of your home’s exterior improvements.
Getting Started with Easy Outdoor DIY Projects
Starting an outdoor project requires preparation to ensure efficiency and safety. Knowing the right tools, budgeting accurately, and following safety guidelines will make the process smoother and minimize unexpected issues.
Essential Tools and Materials
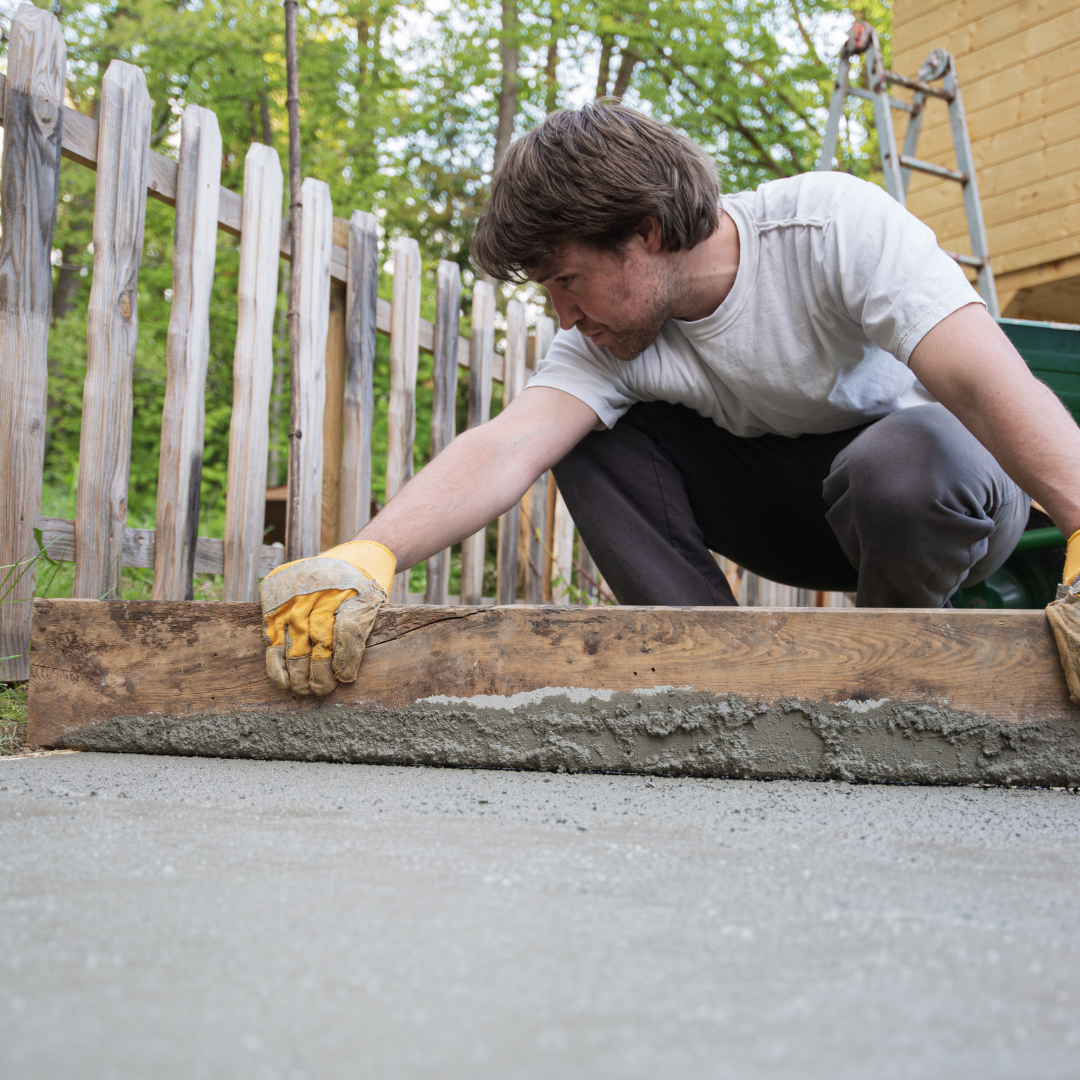
A few basic tools can cover most simple outdoor projects: a hammer, screwdrivers, measuring tape, level, and a cordless drill. For gardening or landscaping, include gloves, pruning shears, and a spade. Material choices depend on the project but often include treated wood, weather-resistant screws, and outdoor paint or sealant.
Organize the tools and materials before starting. Keeping items within reach reduces time spent searching and helps maintain focus. Assess the condition of your tools and replace any that are worn out to avoid delays or accidents.
Budgeting for Outdoor Upgrades
Set a clear budget by listing all anticipated costs: materials, tools (if you must buy), and any extra expenses like disposal fees. Prioritize spending on durable materials to extend the life of your project. Keep a contingency of 10-15% for unexpected costs.
Track your expenses as you go, using a simple spreadsheet or app. Comparing prices between local stores and online suppliers can help you find the best deals without sacrificing quality.
Safety Tips for Outdoor DIY
Wear protective gear such as gloves, safety glasses, and ear protection when using power tools. Always check the condition of your tools before use to avoid malfunctions. Secure your work area to prevent trips or falls, especially if cords or debris are involved.
Be mindful of weather conditions; avoid working when surfaces are wet or slippery. Follow the manufacturer’s instructions for all tools and materials. If your project involves electricity or heavy lifting, consider professional help to reduce risk.
DIY Patio and Deck Enhancements
Enhancing outdoor spaces can be both functional and stylish. Adding seating, tables, and planters creates inviting areas and maximizes comfort without major construction.
Building a Simple Wooden Bench
Start with cedar or treated pine for weather resistance. Cut two 2x4s for the legs and two 1x4s for the seat slats. Assemble by screwing the legs to the seat slats, spacing slats about half an inch apart for drainage.
Sand all surfaces smooth to avoid splinters, and apply a clear outdoor sealant. The bench should measure roughly 48 inches long and 18 inches high for standard seating comfort.
This build requires minimal tools: a drill, saw, sandpaper, screws, and a measuring tape. It offers sturdy seating and can be customized with paint or cushions.
Easy Pallet Coffee Table Construction
Use a standard pallet as the table base, ideally one marked heat-treated (HT) to avoid chemicals. Sand the pallet thoroughly to remove rough spots.
Add four caster wheels to the pallet corners for portability. Fit a sheet of glass or a wooden top cut to size for a flat surface.
Optional: paint or stain the pallet to match existing decor. The table typically measures around 40×24 inches and serves well for casual outdoor lounging areas.
Creating Portable Planter Boxes
Construct planter boxes from cedar for durability. Cut four pieces: two long sides and two short sides, assembling into a rectangle with screws.
Line the interior with landscape fabric to retain soil but prevent water pooling. Attach handles on each end using metal brackets for easy moving.
A typical size is 24×12×12 inches, suitable for herbs or flowers. Portable planters add greenery and can be rearranged to suit changing outdoor layouts.
Backyard Lighting Solutions
Enhancing your backyard lighting can improve safety, ambiance, and functionality. Effective DIY methods include solar-powered options, creative string light installations, and decorative lantern projects suitable for various skill levels.
Solar Pathway Lights Installation
Solar pathway lights are an efficient way to illuminate walkways without wiring. Start by selecting solar lights with durable weather-resistant housings and bright LEDs to ensure longevity and visibility.
Installation involves placing the lights evenly along your path, ideally 6 to 8 feet apart for balanced illumination. Make sure each solar panel is exposed to direct sunlight during the day for optimal charging.
To secure the lights, use the included stakes driven into soft soil or add gravel to stabilize them in harder ground. Clean the solar panels regularly to maintain light output and check battery condition yearly to prevent performance drops.
DIY String Light Poles
String light poles bring overhead lighting to outdoor spaces lacking natural fixtures. Materials needed are metal or wooden poles, eye hooks, and heavy-duty string light cables rated for outdoor use.
Set the poles vertically at desired points, usually along patio edges or garden beds, anchored securely in the ground or concrete bases for stability. Eye hooks go near the top to hold the light strings taut and aligned.
String the lights between poles, ensuring enough slack to avoid tension that could damage wires. Connect to a ground fault circuit interrupter (GFCI) outlet for safety. This setup gives a flexible and attractive overhead lighting solution.
Mason Jar Lanterns Project
Mason jar lanterns offer a rustic, customizable light source that can hang or sit on surfaces. Choose jars with lids and use either battery-operated LED tealights or small solar lamps.
Create a wire hanger by wrapping floral or craft wire around the jar neck, forming a loop for hanging. Punch drainage holes in the jar lid if using real candles to prevent moisture buildup.
Arrange these lanterns along fences, trees, or tables for intimate lighting. They’re inexpensive to make and easy to refresh with new candles or batteries, fitting well with several backyard aesthetics.
Simple Garden Improvement Ideas
Enhancing a garden can be done through straightforward methods that improve both aesthetics and functionality. Each approach focuses on maximizing space and elevating the garden’s usability.
Raised Garden Beds from Scratch
Raised garden beds are effective for improving soil quality and drainage. To build one, start by selecting rot-resistant lumber such as cedar or redwood. The frame typically measures 4 feet by 8 feet, which allows easy access to the center without stepping on the soil.
Fill the bed with a mix of compost, topsoil, and organic matter for optimum growing conditions. Raised beds help reduce weed growth and make it easier to maintain plants. Installation requires basic tools: a saw, drill, screws, and a level.
Raised beds also extend the growing season by warming the soil faster in spring. Position your beds in an area with at least 6 hours of sunlight daily. Adding a border around the bed can keep soil from spilling out and give a neater appearance.
Vertical Herb Gardens
Vertical herb gardens save space, ideal for small yards or patios. Use pallets, metal grids, or specially designed wall planters as the structure. The goal is to create layers to maximize surface area for planting herbs like basil, thyme, and mint.
Ensure good drainage by lining containers or using materials with built-in holes. Mounting the garden on a sunny wall or fence will provide the necessary light. Herbs benefit from regular watering but avoid waterlogging.
This method makes harvesting convenient and keeps plants organized. Consider adding labels for easy identification. Portable vertical setups are also possible, using freestanding frames or tiered pots.
Decorative Rock Borders
Rock borders define garden spaces by setting clear boundaries for flower beds or pathways. Select rocks based on size and style, such as smooth river stones for a casual look or cut granite for a formal style.
Installation involves digging a shallow trench to hold the rocks securely in place, preventing shifting. Place larger rocks at the base with smaller ones on top for stability. Borders help contain mulch, reduce soil erosion, and add texture contrast.
Arrange rocks tightly for a clean edge or loosely for a natural feel. Using landscape fabric beneath the rocks can prevent weed growth. This project requires minimal maintenance and adds a timeless, rugged element to garden design.
Creative Outdoor Decor Projects
Outdoor decor can add personality and charm to your space through simple, creative efforts. Using materials easily found at home or garden stores, you can craft items that are functional, decorative, and tailored to your style.
Painted Stepping Stones
Painted stepping stones offer a personalized path element that brightens any garden or yard. Start with plain concrete stones or make your own using a mold and quick-setting cement. Use acrylic paint designed for outdoor use to create patterns, shapes, or even stencil names and dates.
After painting, sealing the stones with a clear outdoor sealer protects the design against weather and wear. Arrange the stones in a winding path or use them to highlight specific garden areas. This DIY project requires minimal tools: paintbrushes, stencils, and sealant are enough.
Homemade Bird Feeders
Building bird feeders invites wildlife to your yard and adds a dynamic visual element. Common materials include recycled wood, pine cones, or empty plastic bottles. The design depends on your desired bird species, but a mesh feeder filled with seeds or a simple platform feeder works well.
Mount your feeder in a shaded area safe from predators. Ensure easy access for cleaning to prevent mold and disease. This project helps you observe nature closely while promoting local bird populations through a consistent food supply.
Outdoor Wall Art Displays
Display art outdoors to complement garden walls, fences, or patios with style. Use weather-resistant materials such as metal, treated wood, or ceramic tiles. You can paint custom murals, mount decorative panels, or hang framed artworks designed specifically for exteriors.
Installation requires sturdy hooks or brackets suitable for uneven surfaces. Regularly inspect pieces for damage from sun or rain and reapply protective sealants. This project turns blank walls into focal points and encourages creativity with durable, lasting media.
Functional Outdoor Storage Solutions
Outdoor storage solutions improve organization and protect items from weather damage. These projects are practical and customizable, allowing you to save space while maintaining easy access to tools and supplies.
DIY Storage Bench
A DIY storage bench combines seating with hidden storage space. Start with pressure-treated wood for durability. Use waterproof sealant to extend the life of the bench.
Build a sturdy frame with a hinged top for easy access. The interior can be divided into compartments for garden tools, cushions, or toys. Add weather-resistant cushions for comfort.
Use stainless steel screws to resist rust. Painting or staining the bench protects it further and matches your outdoor décor. This project typically requires basic carpentry tools like a saw, drill, and screwdriver.
Building a Small Tool Shed
A small tool shed provides a dedicated space for lawn equipment and garden supplies. Choose materials like cedar or redwood to resist rot and insects.
Design the shed with ventilation to prevent moisture buildup inside. Include shelves and hooks for organized storage of small tools and garden hoses.
A slanted roof helps with water runoff and snow accumulation. Use galvanized nails and hinges to prevent rust. The shed size can be customized, typically ranging from 4×6 to 6×8 feet.
Weather-Proof Outdoor Cabinets
Outdoor cabinets keep frequently used items secure and protected from the elements. Use marine plywood or PVC boards as primary materials for water resistance.
Seal edges with waterproof caulk. Install doors with magnetic or lockable latches to keep contents safe. Shelves inside can be adjusted to accommodate various storage needs.
Locate the cabinets under a covered area or attach a small roof to improve weather protection. Consider applying non-slip feet to avoid water damage from ground contact. Cabinets can be wall-mounted or freestanding based on available space.
Water Feature Additions for Beginners
Water features can transform outdoor spaces with minimal effort. Basic tools and materials are all you need to create functional, attractive additions that improve your yard’s ambiance.
Miniature Pond Setup
A small pond provides a calming focal point and attracts wildlife. Begin by selecting a shallow spot with partial shade to avoid excessive algae growth. Use a flexible pond liner to fit irregular shapes, and dig a hole about 12-18 inches deep.
Add sand or a protective underlayment under the liner to prevent damage from rocks or roots. Place flat stones around the edge for a natural look. Include aquatic plants like water lilies to improve water quality and aesthetics.
Install a small pump with a filter to keep water circulating and prevent stagnation. Regularly check water levels and remove debris to maintain clarity.
Easy DIY Fountain
Creating a fountain requires a container, a water pump, and simple plumbing supplies. Choose a sturdy waterproof container like a ceramic pot or a repurposed basin with a flat base.
Place an appropriate submersible pump inside, with tubing to direct water to the fountainhead or spout. Cover wiring to protect it from water exposure. Secure the pump and hose, then fill the container with water.
Adjust the flow rate as needed using the pump’s controls. Stones or decorative elements on top can elevate the design while hiding tubing. Routine cleaning of the pump and water replacement will ensure smooth operation.
Rain Barrel Installation
Rain barrels collect roof runoff for garden use, conserving water and reducing erosion. Position a barrel under a downspout with a screen to filter debris. It should sit on a raised platform for easier access to the spigot.
Choose a barrel with an overflow outlet to handle heavy rain. Connect a hose or use a watering can to distribute water to plants. Ensure the barrel seals well to prevent mosquitoes and maintain water quality.
Regularly clear gutters and inspect the barrel for cracks or algae buildup. A simple rain barrel system can reduce water bills and support sustainable gardening practices.
Kid-Friendly Outdoor DIY Projects
Creating simple, hands-on projects for kids encourages creativity and outdoor play. These projects use basic materials and safe designs suitable for young children while offering hours of engagement.
Backyard Teepee Construction
A backyard teepee provides a cozy play area and is easy to build using wooden poles and fabric. Start with five or six long poles, securing them at the top with rope or zip ties to form a stable frame.
Drape a durable, weather-resistant fabric over the frame. Canvas or outdoor blankets work well for this purpose. Leave one side open to create an entrance and secure the fabric with clips or ties to keep it in place.
For added fun, decorate the teepee with fairy lights or outdoor cushions inside. This project encourages imaginative play and helps define a personal outdoor space for children.
Chalkboard Fence Panel
Transform a section of fence or a wooden panel into a large, reusable chalkboard. Use exterior-grade chalkboard paint applied in 2-3 thin coats for a smooth writing surface.
Ensure the panel is sanded and clean before painting. Mount the panel securely at child height for easy access. Include a small shelf or tray below the board to hold chalk and erasers.
This project creates an interactive art space outside and can be updated daily. It’s low-cost and encourages creative expression without mess inside the house.
Simple Sandbox Build
Constructing a sandbox requires a wooden frame and a safe sand source. Use untreated lumber or cedar to avoid harmful chemicals, cutting boards into a square or rectangular shape, generally 4×4 feet.
Line the bottom with landscape fabric to prevent weeds. Fill the box with fine, clean play sand available at garden centers or home improvement stores.
Add a simple cover made from wood planks or a tarp to protect the sand when not in use. Sandboxes promote sensory play and can be enhanced with small toys like buckets and shovels for extended use.
Low-Maintenance Landscaping Tips
Efficient landscaping involves reducing water use and minimizing upkeep without sacrificing appearance. Techniques such as mulching and choosing the right plants are essential for a low-maintenance outdoor space.
Mulching Techniques
Mulching conserves soil moisture, suppresses weeds, and regulates soil temperature. Use organic mulches like wood chips, bark, or compost because they improve soil fertility as they decompose.
Apply a 2- to 4-inch layer of mulch around plants, avoiding direct contact with stems to prevent rot. Refresh mulch annually or as it breaks down to maintain effectiveness.
Inorganic options like rubber mulch can also reduce maintenance by lasting longer and preventing weeds, but do not improve soil health. Consider local climate and plant types when selecting mulch.
Selecting Drought-Resistant Plants
Choose plants adapted to the local climate to reduce watering needs. Native species often thrive with less care, resist pests, and support local ecosystems.
Examples include lavender, sedum, and ornamental grasses in dry zones. Group plants with similar water needs to simplify irrigation.
Use deep-rooted perennials to promote water absorption and reduce soil erosion. Avoid high-maintenance varieties that need frequent trimming or fertilizing.
Outdoor Entertaining Spaces
Creating an inviting outdoor area can extend your living space and enhance social gatherings. Simple projects like installing a fire pit or setting up a movie night area transform your yard into a functional entertainment zone.
DIY Fire Pit Installation
Start by selecting a safe, level spot at least 10 feet from structures or trees. Use materials like fire bricks, retaining wall blocks, or steel rings to build the pit. A popular shape is circular, roughly 36-44 inches in diameter.
Excavate the area about 6-8 inches deep and fill it with gravel for drainage. Stack blocks carefully, using heat-resistant adhesive if desired, to secure them. Leave gaps or create vents for airflow to maintain an efficient fire.
Safety is crucial: keep a bucket of water or a fire extinguisher nearby. Cover the pit with a metal screen when not in use to prevent sparks and debris from escaping. This project can be completed in a weekend with basic tools.
Setting Up a Movie Night Area
Choose a flat surface and set up a portable projector with a white screen or a smooth wall as the backdrop. Arrange seating using outdoor cushions, bean bags, or foldable chairs for comfort.
Ensure proper cable management and lighting control to optimize the viewing experience. Add string lights or lanterns for ambiance without interfering with the screen visibility.
Consider a small table or cooler nearby for snacks and drinks. Portable speakers or a soundbar enhance audio quality. This setup allows for flexible placement and can be packed away easily after use.
Conclusion
Outdoor DIY projects can enhance your home’s functionality and aesthetic without requiring extensive skills or resources. Simple tasks like building a planter box or installing a bird feeder add value and enjoyment.
Choosing projects that fit your time and budget ensures steady progress and satisfaction. Prioritize safety and proper tools to avoid common pitfalls.
Here’s a quick reminder:
| Benefit | Description |
| Cost-effective | Save money by using your own labor |
| Customizable | Tailor projects to your space |
| Skill-building | Gain practical experience |
Starting small and scaling up keeps projects manageable. Whether it’s a new bench or garden pathway, each effort makes your outdoor area more inviting.
Remember, patience is key. Results grow over time, and consistent effort will yield lasting improvements.